Tools Required:
36mm wrench and fan removal tool (often sold as a set for GM/Ford vehicles)
T-25 torx bit
Metric socket set and ratchet
3/8 inch breaker bar (optional)
Materials:
New primary drive belt
New secondary drive belt
Disclaimer: The specific vehicle in the guide is a 2006 Range Rover HSE which does not have the terrain response feature as well as a supercharger. Consequently, if you are performing this procedure on newer models be vigilant that you route the belt correctly over the supercharger pulley (if supercharged) as well as the terrain response pulley. As always perform this procedure at your own discretion with the assumption that any repair on a vehicle has the potential for physical harm.
Procedure:
(Optional) The first step I like to do when performing any extensive under-the-hood work is raise the hood to "service mode" by unclipping the hood struts. Take a flat head screw driver and pry out the metal tabs on the bottom of the struts and raise the hood until you can slide the retainment piece of metal onto the nub on the hood. Once again this is only optional (I have banged my head so many times on the hood it is good to get it out of the way).
1.) Unscrew the engine cover screws (4 total) and undo the oil cap to remove the engine cover.

2.) Unbolt the retention bracket for the air intake assembly.

3.) Unclip the MAF sensor connector harness.

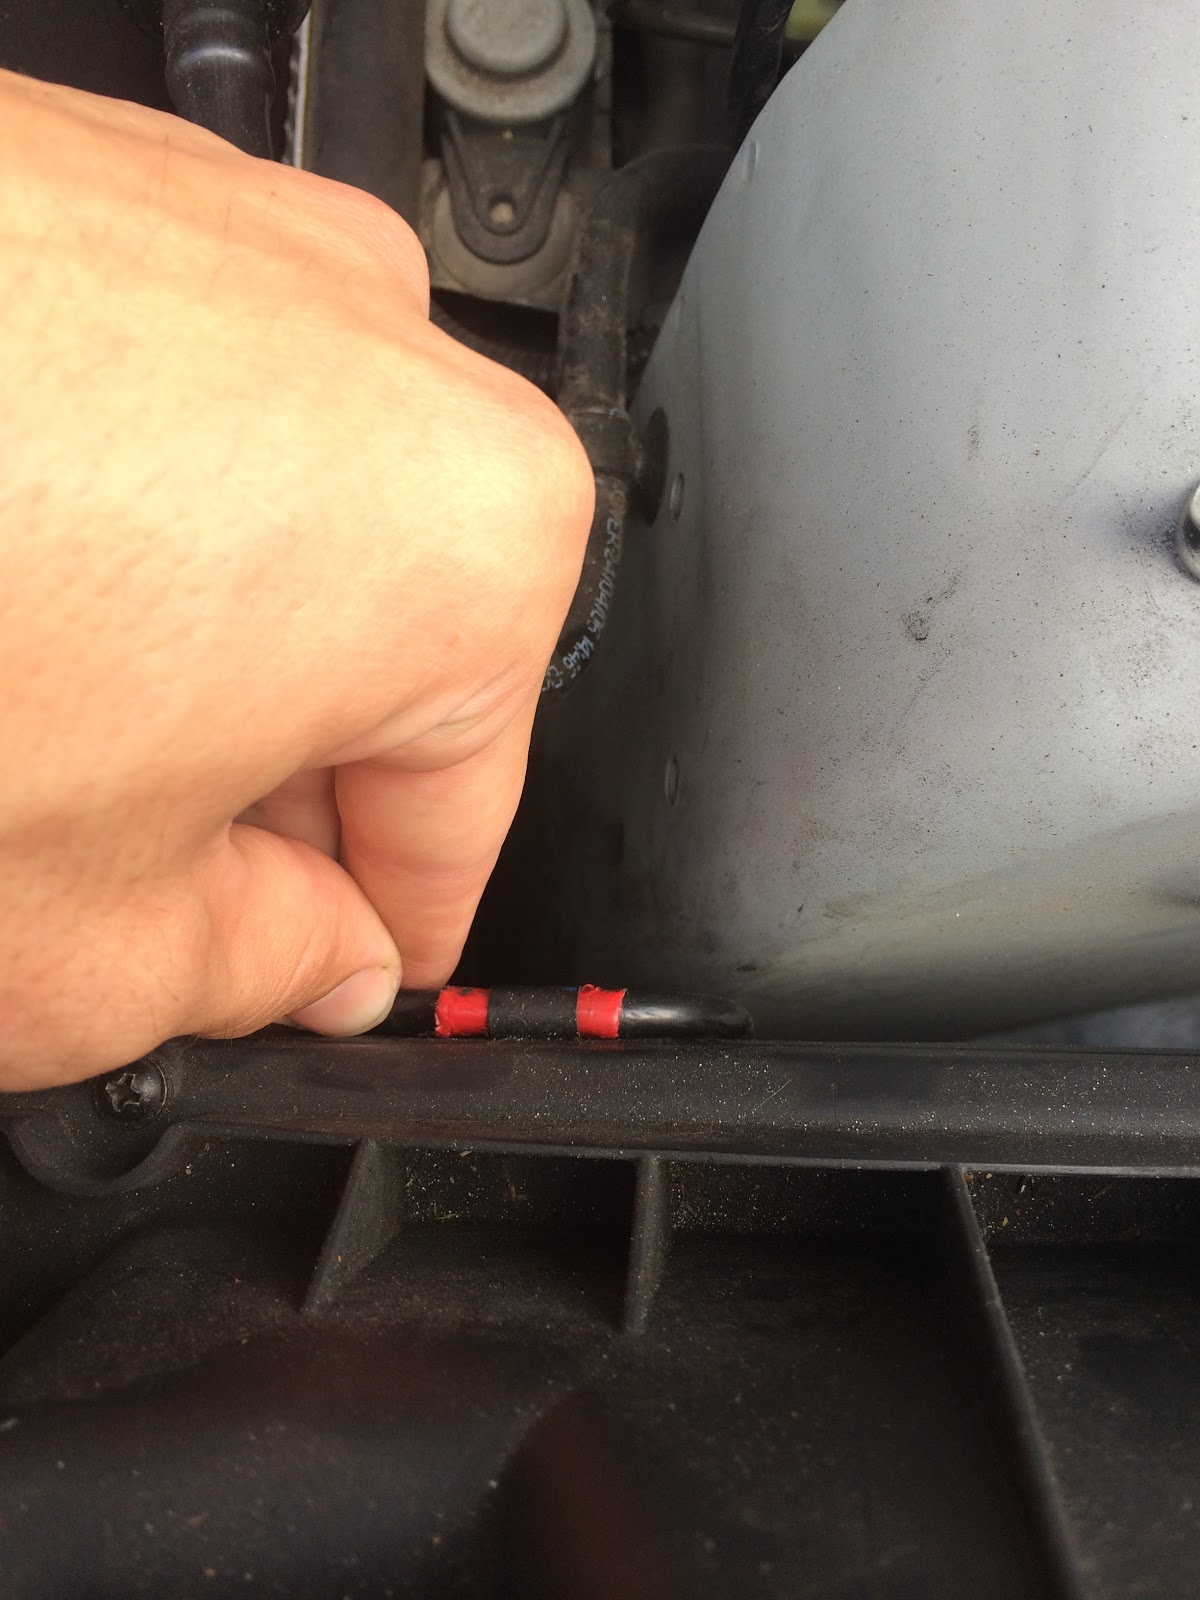
4.) Remove tubing connected on rear portion of assembly (I taped mine red so I wouldn't forget to snap back into place on reassembly).
5.) Remove additional tubing harness on assembly.

6.) Remove entire assembly carefully (MAF is very easily damaged) and set aside.

7.) Unclip AC line on top of cooling fan shroud (2 clips top + 1 side).

8.) Position the 36mm wrench on cooling fan nut.

9.) Position fan tool on top bolts of the cooling fan assembly (ensure hooks are positioned correctly).

10.) Applying force on the wrench to the right (bolt is threaded opposite of standard) brace the fan tool until the nut breaks free (may take excessive force; I had to use breaker bar on the 36 mm wrench).


11.) After nut has broken free simply spin the fan to the right to remove the fan assembly.


12.) Unclip the fan connection harness and unclip retaining holder from shroud.

13.) Unclip pollution sensor harness from shroud.

14.) Use T25 bit to remove upper shroud screw.

15.) Use T25 bit to remove automatic transmission cooler screw and slide assembly upward to detach.

16.) Remove the lower T25 screw positioned below the automatic transmission cooler.
Disclaimer: this part is painstakingly difficult.. I replaced the T25 screw after removal with a metric screw for easier removal in the future.

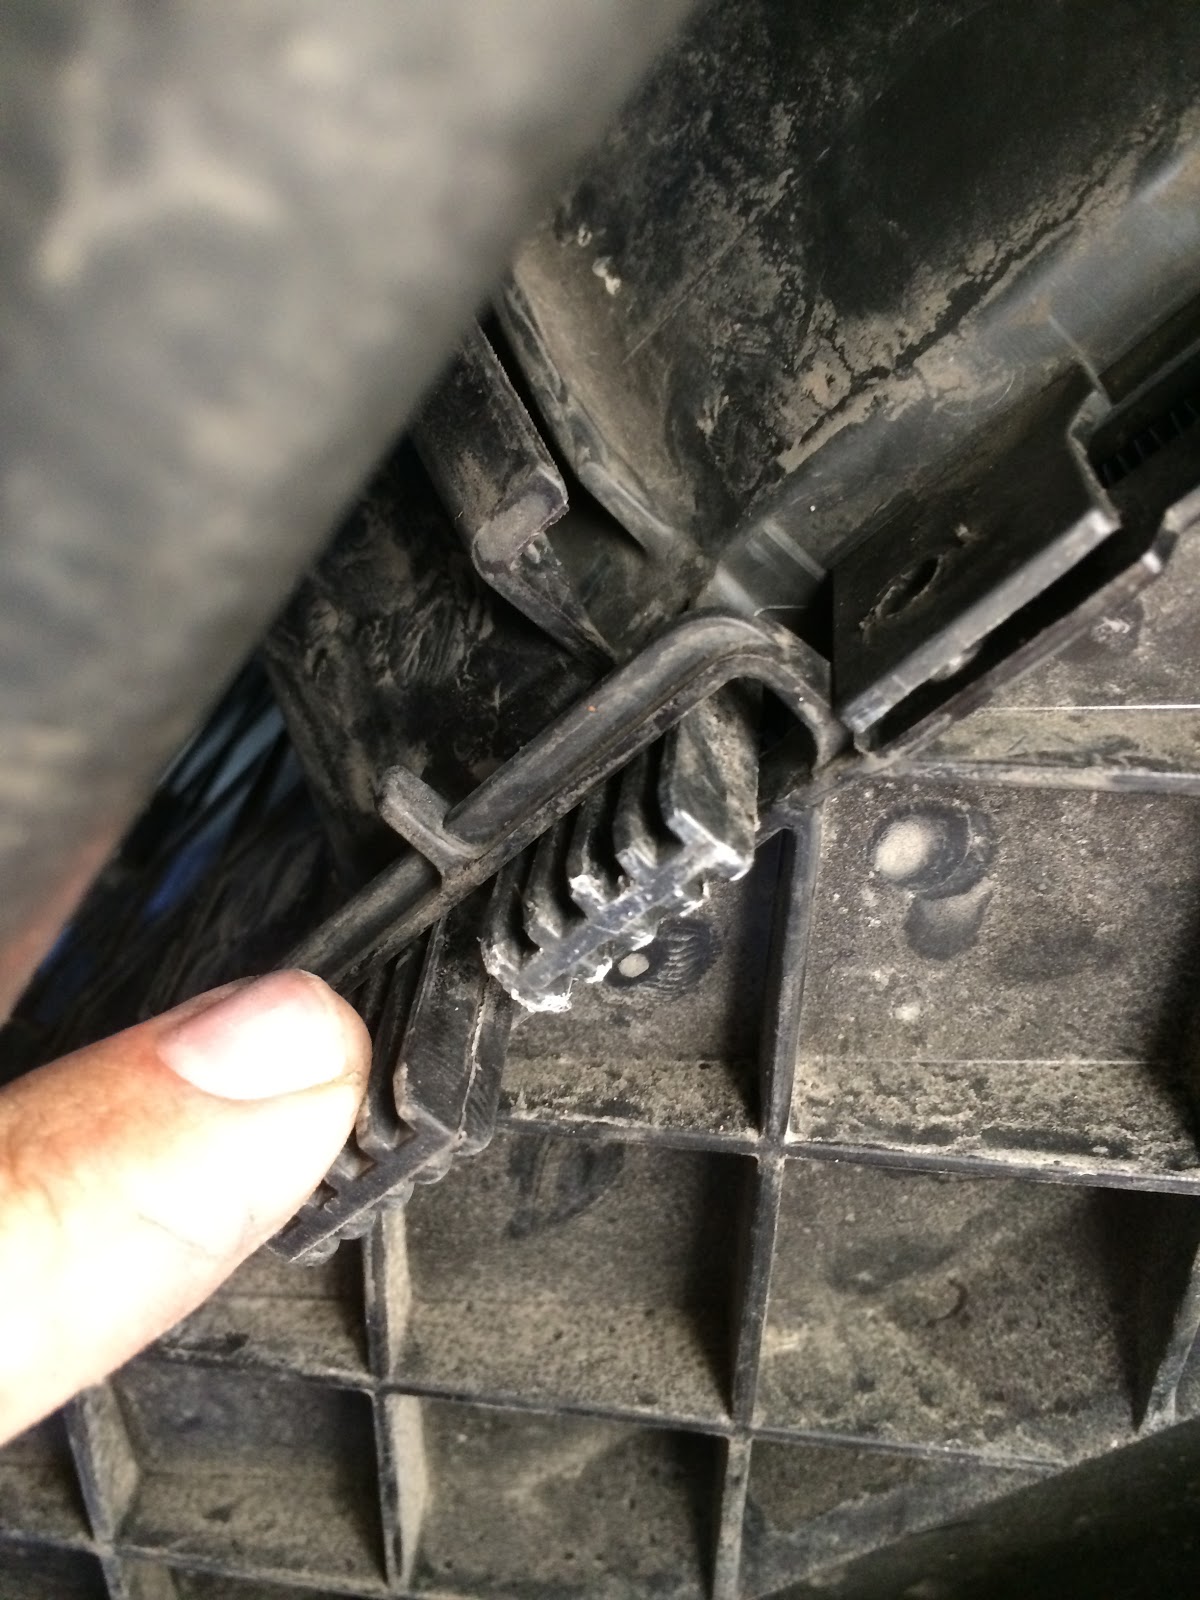
17.) Remove pushpins on top and bottom of shroud (2 on top + 1 on bottom). I replaced these with zipties for convenience. Remove splashguard on bottom of car.


18.) Unclip hose lines on bottom of shroud and right side of shroud.

19.) Tuck AC lines towards the rear of the cooling shroud on top so the shroud can slide out.

20.) Pull shroud out from engine along with unbolted fan.. this part can be fun..

21.) Once fan is removed, clean off rear of radiator and position piece of cardboard to protect tools smashing the radiator on the back side (optional if you are careful). Release tensioner using breaker bar or 3/8 ratchet. Remove secondary drive belt (note routing configuration for reinstall).

22.) Using fan removal tool unscrew each screw holding the water pump pulley cover on.

23.) After cover is removed use extension to unscrew remaining 5 bolts securing the shaft.

24.) Once apparatus is removed unscrew secondary drive belt tensioner.


25.) Use 3/8" breaker bar or socket to release the tension on the primary drive belt and remove (note routing configuration for reinstall).

26.) Optional: lubricate/replace any bearings and clean pulleys if dirty.
27.) Reinstall following reverse procedure. Important: make sure routing is correct and that fan shroud lines up perfectly.. blades on fan should not contact brush fringe on the shroud (spin by hand to verify).
28.) When lining the shroud up on reinstall make sure to position the tabs on the bottom of the shroud correctly (two on bottom and one on left side). This will ensure the shroud is in the correct position.
29.) Finally make sure the fan is threaded onto the bolt to the left (opposite of standard) and that the bolt is torqued to 65 Nm.
Thanks for viewing this guide! As always if you have any feedback please leave comments below.
I use Titanium Exhaust for Range Rover
ReplyDeleteIt Great Exhaust from Thailand.
goldenslot
gclub
goldenslot
goldenslot.gclub-casino.com
g-club.net
golden-slot.com
Enjoyed reading the article above, really explains everything in detail,the article is very interesting and effective. Thank you and good luck for the upcoming articles and visit this for collecting free Nintendo eShop goft card codes
ReplyDeleteI will really appreciate the writer's choice for choosing this excellent article appropriate to my matter.Here is deep description about the article matter which helped me more. SOLVANG APPLIANCE REPAIR
ReplyDeleteI read it whole and going to share it with my social circle. I enjoyed your article please visit our website I assure you that it will be very useful for you.take a look at Jacqueline Fernandez HD wallpapers
ReplyDeleteExcellent guide! I found getting the fan back on to be the most tedious bit. The fan shroud was not designed with repair in mind. I've done this on multiple LR3's (same engine) and it was way easier.
ReplyDeleteI removed my fan from a 2006 Range Rover L322 Supercharged (4.2 Jaguar engine) just a few hours ago. The fan “nut” has a conventional, right-hand thread, and loosened counter-clockwise (that is, “lefty loosey”) when at the front of the truck facing the rear (the only way you can position yourself to actually work on the fan).
ReplyDeleteI have seen some posts that indicate the opposite (which is what I tried initially). Obviously, YMMV and JLR may have changed the threads from year to year and model to model and S/C may be different from NA, but “lefty loosey” worked for me!
Great post, thank you
ReplyDeleteThanks for clarifying threading on the fan nut
DeleteEnjoyed reading the article above, really explains everything in detail, the article is very interesting and effective. Thank you and good luck for the upcoming articles and visit is desmume safe
ReplyDeleteThanks. Working on my L322 right now, very helpful. Checking a leaky coolant hose, and replacing the radiator. 4.4 Jag engine 2006
ReplyDeleteHelpful procedure
ReplyDelete